The Entrance We Outgrew and the One We Built Again
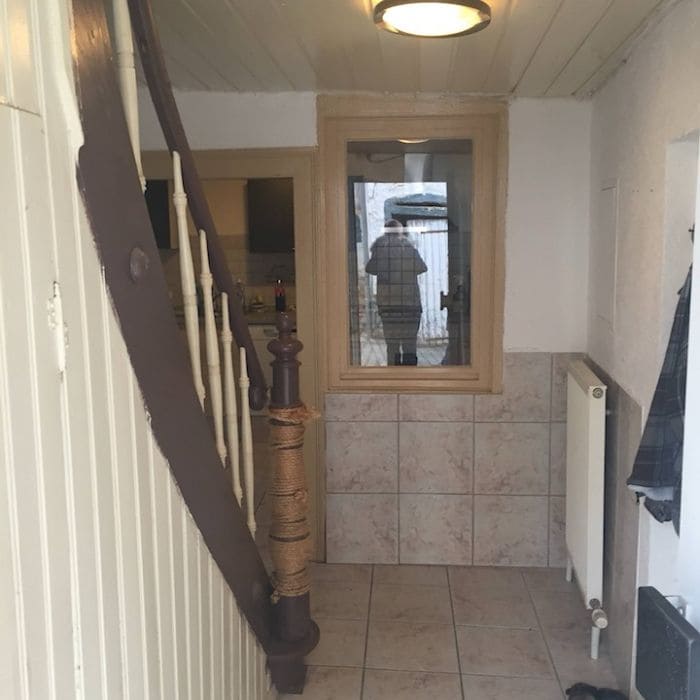
When I look at these two photos now, I can clearly see how much time passed between them. The first image shows our entrance from more than ten years ago. At that time, it felt practical enough. The space is narrow, about 1.2 meters wide and just under 4 meters long, with a staircase cutting…
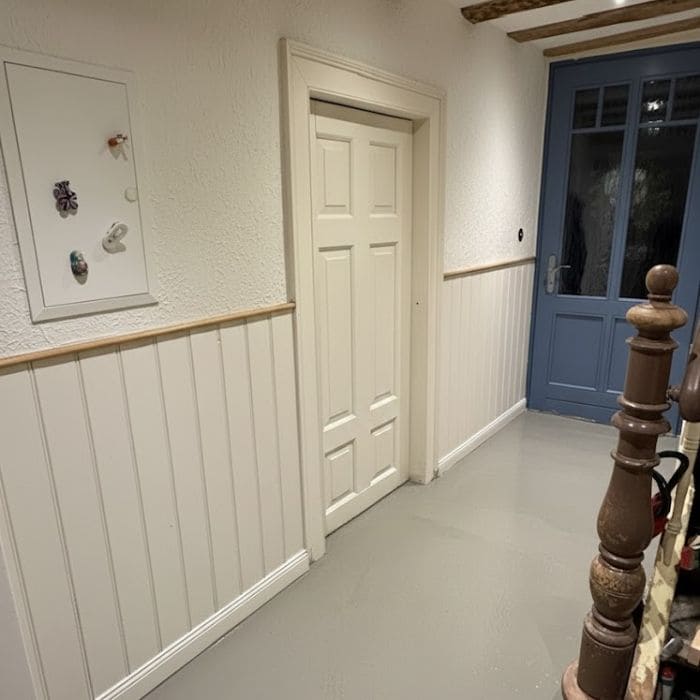
When I look at these two photos now, I can clearly see how much time passed between them. The first image shows our entrance from more than ten years ago.
At that time, it felt practical enough. The space is narrow, about 1.2 meters wide and just under 4 meters long, with a staircase cutting into one side.
The tiles were standard ceramic, pale and easy to clean, but also cold and flat. It did its job, but it never made me pause. I would walk in, drop my bag, and move on without really seeing it.
Over the years, the rest of our house slowly changed. Wooden furniture replaced lighter pieces, warmer colors crept in, and I found myself drawn more and more to old houses, solid materials, and spaces that feel lived in.
That entrance stayed the same, and eventually it started to feel like it belonged to someone else. One night, I mentioned it again while we were clearing shoes near the door.
Dan stood there for a moment, looked at the floor, and said quietly, “It doesn’t fit us anymore. If we’re going to do it, let’s do it properly.”
Finding the Tiles That Changed Everything
I knew the floor would decide everything and I wanted old patterned tiles, the kind you usually find in early 1900s houses, with soft colors and slightly uneven edges.
Tiles like that are heavy, thick, and not easy to find. We searched for weeks. I checked online old-house groups, renovation pages, second-hand markets, and even demolition listings.
Every evening, I would scroll on my phone while Dan half-listened, occasionally saying, “These look close,” or “What about this one?”
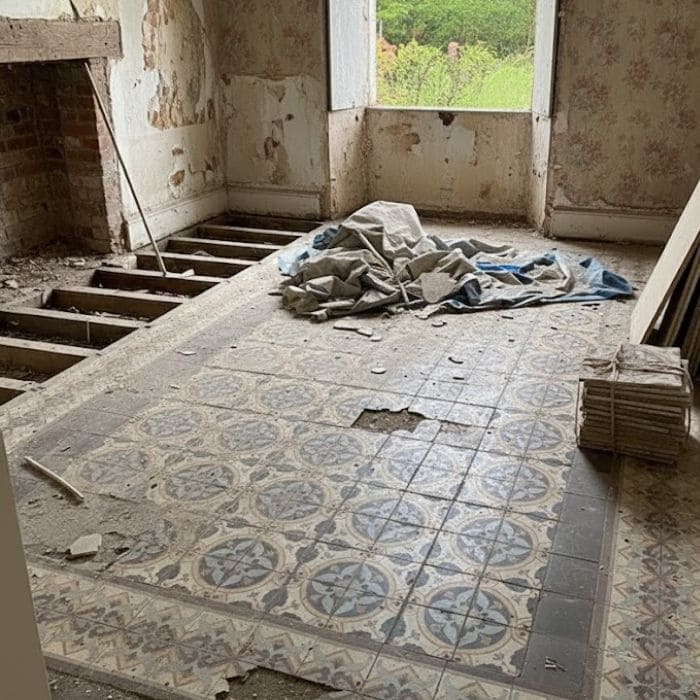
Then luck showed up in the most unexpected way. Someone posted about an old house nearby being stripped for renovation. The owner was clearing everything, including a pile of original cement tiles from their entry.
The tiles were roughly 20 × 20 cm, about 18 mm thick, dusty and chipped, but beautiful. I asked about the price, already preparing myself to let it go. The reply came back simple and kind: “If you can take them, they’re free. Otherwise, they’ll be thrown away.”
We picked them up the same day. Loading those tiles into the car felt unreal. They were heavy, cold to the touch, and full of history. They cost nothing, yet they became the most valuable part of this renovation.
Preparing the Space Before Laying Anything Down
Before touching the tiles, Dan focused on the base. The old ceramic floor had to come up completely. Underneath, we found uneven concrete, so the first step was leveling the surface properly.
This part is not visible once finished, but it matters the most. The hallway floor now has a cement leveling layer of about 2-3 cm, ensuring the old tiles sit flat and don’t crack over time.
We dry-laid the tiles first, without glue, just to plan the pattern. Because the hallway is narrow, we centered the main motif and let the border tiles run along both sides.
This step alone took hours. We adjusted, removed, and placed them back again until the pattern flowed naturally from the front door toward the stairs.
Laying the Tiles, Slowly and Carefully
For fixing the tiles, we used a flexible tile adhesive designed for thick cement tiles, not standard ceramic glue. Spacers were kept minimal, around 2-3 mm, because old tiles look best when they sit close together.
Dan laid them row by row, constantly checking levels, while I cleaned excess adhesive before it dried.
Once everything set, we applied a matte stone sealer, two coats, to protect the surface without making it shiny. The goal was to let the tiles age naturally, not freeze them in a perfect finish.
Materials We Used in the Entrance Renovation
- Reclaimed cement tiles (20 × 20 cm, approx. 18 mm thick)
- Cement-based leveling compound (2-3 cm layer)
- Flexible tile adhesive for heavy tiles
- Narrow tile spacers (2-3 mm)
- Matte stone sealer (two coats)
- Wood paneling for lower wall section
- Neutral wall paint with warm undertone
- Solid wood bench (90 cm long, 30 cm deep)
- Simple wall hooks and concealed fixings
Finishing Touches That Make It Feel Right
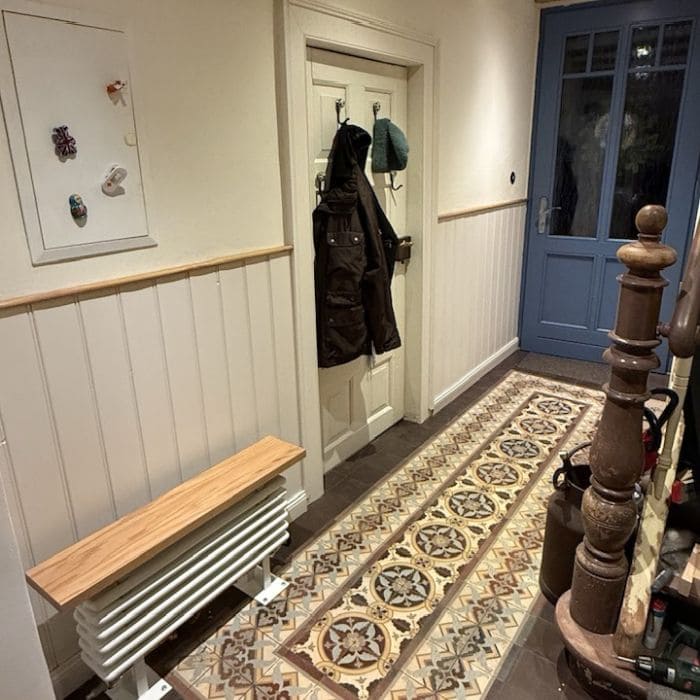
The walls were just as important as the floor. We added paneling to the lower half, painted in a soft neutral that works with the tile colors instead of fighting them.
The upper walls stayed light, which helps the narrow hallway breathe. The exposed wooden beams on the ceiling were cleaned and left natural, bringing warmth back into the space.
We added a slim bench along the wall, just wide enough to sit and take shoes off without blocking the walkway.
If space allows, I always recommend a floating shelf about 20 cm deep for keys and small items, placed around 110-120 cm high, so it’s useful but never in the way. A small mirror near the door also helps bounce light and makes the hallway feel longer.